Spring is in the air...
The promised deck info post. Back a couple weeks ago when I posted the redesign of the frame to accomodate the deck, the reason was the sheet metal detail was completed.
At one point, I had thought of repurposing a deck just to get everything going, but the mods to a rusty nasty deck would have been more extensive than just going from scratch. Also, the thought of cutting all the sheet steel with a sawzall was less than motivating. Instead, I took the CAD drawings and sent them to a local shop I found on the internet. They came back with an extremely attractive quote to laser cut them, including material for $50. It took a couple weeks, but the quality is outstanding. They are in Lima, NY and are very easy to deal with. Nice folks too.
Smidgens Inc
I sent them a DXF of what I wanted in 16 ga steel, no need to worry about layout as they optimize it automatically.
Here is a shot of the battery tray and a couple of pieces for the belt guards. The flat piece shows the slots cut in to facilitate bending without a brake. The small guard is shown after bending in the vise by hand. A few tack welds will hold it well.
Here is a shot of the underside of the mower deck. The two hoops were bent by hand and tacked together, then the bevel was attached to the top by tacking on the inside and running a full bead around the outside ( you can see the HAZ ). The lower rim is tacked on, but not yet fully welded.
Here is the (mostly) finished product. The lower rim is fully welded, both joints are ground smooth. The exit chute is also formed and welded on.
Next up are the belt guards and mounting the alternator.
After painting, the wiring comes next and we're getting very close...
An attempt to document and share the design & build process of a remote radio controlled steep slope mower. References to sources are included where it seems to make sense.
All material is copyright (C) 2015 & 2016 by me.
Posts are in reverse date order, scroll to the bottom for the beginning...
Saturday, March 19, 2016
Sunday, March 6, 2016
Yes, we are still here...
My last post was in January and it is now March. A lot has happened, but nothing has yet been shared. There should be a few catch-up posts this week or so.
Upcoming posts:
1) electrical progress
2) mower deck details
Over the last week, there was a slight design change. After finalizing the deck detail, a few frame elements needed to change to make everything fit better.
The front cross member needs to move forward and since today was relatively nice out ( 40 and "sunny" ), it was easier to make a mess out in the driveway than in the garage rough cutting the aluminum stock on the saw.
My last post was in January and it is now March. A lot has happened, but nothing has yet been shared. There should be a few catch-up posts this week or so.
Upcoming posts:
1) electrical progress
2) mower deck details
Over the last week, there was a slight design change. After finalizing the deck detail, a few frame elements needed to change to make everything fit better.
The front cross member needs to move forward and since today was relatively nice out ( 40 and "sunny" ), it was easier to make a mess out in the driveway than in the garage rough cutting the aluminum stock on the saw.
Frame as it was originally
Fabbing the mounts ( note that with the DRO there are no setup lines on the parts and it is *way* easier and faster to make stuff like this ).
New frame mounts with crossmember moved forward to clear the deck.
Still need to trim the axles a bit shorter as well, but that's all for today.
Sunday, January 17, 2016
A little clarification on something I mentioned in a previous post, and a little humor.
I mentioned that the part numbering on these JS46 mowers was a little bizzare. Turns out there are two things happening with this model.
First, it is sold as a John Deere, but it appears to be manufactured by Murray. Probably them's fighting words to people that bleed green, but it doesn't make any sense it would be the other way around. I'll show why later.
Second, pay attention to the mower serial number. There is a breakpoint before or after 150K ( 150,000 ).
Early models use the GX22837 blade adapter with a GX23522 blade (one holer).
Later models use the GX24214 blade adapter with a GX24213 blade (three holer).
early:

Late:


Note that I could not find a picture of the GX24214 anywhere, these are pics I took. I think this part is top secret or something, very odd it is that hard to find.
Both adapters are about $10 each, and the blades are about $30 online. Interesting, though, the early blade 23522 is available at Lowes for $19. No where on the package is indicated it is only for early mowers. Curious. Par for the course there.
Back to my second point. Murray.
The numbers on the blade adapters, early 7101414, late 7104332, and on the blades early 7104179, late 7103288 are Murray numbers. Strictly they may be AYP or even Briggs, as these parts all came in Briggs boxes. However, they are made in the USA.
At any rate, why go to all this trouble? Like I said before, it is easier to find parts for a model of a mower if you know what you have. JD has a reputation for maintaining supply and their dealers are quality. Many home store blades are crappy thin and often bent. these blades are SERIOUS, almost 1/4 inch thick. They will be much easier to sharpen.
The lesson for today is - if you are looking to buy a mower or any piece of equipment, get the model and search for the parts you might need in the future. You may learn something about the unit you intend to buy, or maybe that it isn't exactly what you think it is after all.
I mentioned that the part numbering on these JS46 mowers was a little bizzare. Turns out there are two things happening with this model.
First, it is sold as a John Deere, but it appears to be manufactured by Murray. Probably them's fighting words to people that bleed green, but it doesn't make any sense it would be the other way around. I'll show why later.
Second, pay attention to the mower serial number. There is a breakpoint before or after 150K ( 150,000 ).
Early models use the GX22837 blade adapter with a GX23522 blade (one holer).
Later models use the GX24214 blade adapter with a GX24213 blade (three holer).
early:

Late:


Note that I could not find a picture of the GX24214 anywhere, these are pics I took. I think this part is top secret or something, very odd it is that hard to find.
Both adapters are about $10 each, and the blades are about $30 online. Interesting, though, the early blade 23522 is available at Lowes for $19. No where on the package is indicated it is only for early mowers. Curious. Par for the course there.
Back to my second point. Murray.
The numbers on the blade adapters, early 7101414, late 7104332, and on the blades early 7104179, late 7103288 are Murray numbers. Strictly they may be AYP or even Briggs, as these parts all came in Briggs boxes. However, they are made in the USA.
At any rate, why go to all this trouble? Like I said before, it is easier to find parts for a model of a mower if you know what you have. JD has a reputation for maintaining supply and their dealers are quality. Many home store blades are crappy thin and often bent. these blades are SERIOUS, almost 1/4 inch thick. They will be much easier to sharpen.
The lesson for today is - if you are looking to buy a mower or any piece of equipment, get the model and search for the parts you might need in the future. You may learn something about the unit you intend to buy, or maybe that it isn't exactly what you think it is after all.
Progress at last...
After non-trivial searching for parts, I settled on mower blade, adapter and pulley from the same Deere series mower that the engine came from, a JS46. I ordered them online as that is way cheaper than visiting the local dealer (sorry). HOWEVER, what wasn't clear is that there was a serial number breakpoint where the blade & adapter changed designs. I ordered the correct adapter, but the "cheaper" blade had to be exchanged for the right one.
The earlier blade only had one hole, the newer one has three as shown above. In the diagram (from partstree.com), I chose the 0050 pulley and the 0110 blade adapter to fit.
This is important as the blade adapter mounting surface is 0.9 inch lower than the end of the shaft, and the blade itself has the cutting edges even lower again. This results in the cutting plane being 1.65 inches beyond the end of the shaft. This folds back into the deck design and defines the height of the motor mounting with respect to the lower edge of the sides. Now that part can progress forward.
Additionally, I acquired a Spektrum DX7S radio and AR8000 receiver. Local purchase at Performance Hobbies in Webster.
I was going to get relays from the same place I got the motor controller, but I need at least 3 channels ( I ordered 4 ). They wanted about $25 each, so I looked around a little more. I found Pololu ( same place that makes all kinds of stuff including some of the original RepRap motion control ) had some nice units for under $10 each. I also scored some RC servo cable extensions.
These relays will control the engine start and kill switch plus the motor brakes. These modules interpret the RC servo pulses and turn on the relay at a certain threshold. At this price, it isn't worth making anything. A very rough draft schematic is below.
I am looking at circuit breakers and will probably use a Bussmann 70A switchable unit, which will double as an "off" switch. I may also add some automotive self resetting breakers here and there as I worry about melting things sometimes.
Still working on tooling, the Y axis DRO is getting closer. The encoder mounting plate is done, and working on the bracket for the read head. The new vise is installed and trammed in, what a difference that makes in setup and repeatability!
After non-trivial searching for parts, I settled on mower blade, adapter and pulley from the same Deere series mower that the engine came from, a JS46. I ordered them online as that is way cheaper than visiting the local dealer (sorry). HOWEVER, what wasn't clear is that there was a serial number breakpoint where the blade & adapter changed designs. I ordered the correct adapter, but the "cheaper" blade had to be exchanged for the right one.
This is important as the blade adapter mounting surface is 0.9 inch lower than the end of the shaft, and the blade itself has the cutting edges even lower again. This results in the cutting plane being 1.65 inches beyond the end of the shaft. This folds back into the deck design and defines the height of the motor mounting with respect to the lower edge of the sides. Now that part can progress forward.
Additionally, I acquired a Spektrum DX7S radio and AR8000 receiver. Local purchase at Performance Hobbies in Webster.
I was going to get relays from the same place I got the motor controller, but I need at least 3 channels ( I ordered 4 ). They wanted about $25 each, so I looked around a little more. I found Pololu ( same place that makes all kinds of stuff including some of the original RepRap motion control ) had some nice units for under $10 each. I also scored some RC servo cable extensions.
These relays will control the engine start and kill switch plus the motor brakes. These modules interpret the RC servo pulses and turn on the relay at a certain threshold. At this price, it isn't worth making anything. A very rough draft schematic is below.
I am looking at circuit breakers and will probably use a Bussmann 70A switchable unit, which will double as an "off" switch. I may also add some automotive self resetting breakers here and there as I worry about melting things sometimes.
Still working on tooling, the Y axis DRO is getting closer. The encoder mounting plate is done, and working on the bracket for the read head. The new vise is installed and trammed in, what a difference that makes in setup and repeatability!
Tuesday, January 5, 2016
Progress Update
Yesterday, the Briggs engine arrived via a very mixed up FedEx delivery. Also, I picked up the special order 24 Volt alternator at the local electrical shop. They installed the bidirectional fan and put the smallest diameter pulley on that they had in stock. Normal is 2.5 inch diameter, but they had a 2.25 on hand. They said for best output I should spin it at 4500 RPM, but with a 2.85 drive pulley I should get close to 4000 which is pretty close. I can change the pulleys later if the load balance doesn't quite work out.
Further progress is temporarily on hold. Today I installed the X axis DRO on the mill and also received my new used Kurt D675 vise. I cleaned the machine to install the encoder, and also installed the new vise. It is much more robust than the older Armstrong that I got with the mill. I just need to tram it in, maybe tomorrow, then I would like to install the Y axis encoder to complete the DRO. I also have a Z encoder for the knee, but I'll save that for another day.
These upgrades should allow for easier and more accurate fabrication of remaining parts.
L8R...
Yesterday, the Briggs engine arrived via a very mixed up FedEx delivery. Also, I picked up the special order 24 Volt alternator at the local electrical shop. They installed the bidirectional fan and put the smallest diameter pulley on that they had in stock. Normal is 2.5 inch diameter, but they had a 2.25 on hand. They said for best output I should spin it at 4500 RPM, but with a 2.85 drive pulley I should get close to 4000 which is pretty close. I can change the pulleys later if the load balance doesn't quite work out.
Further progress is temporarily on hold. Today I installed the X axis DRO on the mill and also received my new used Kurt D675 vise. I cleaned the machine to install the encoder, and also installed the new vise. It is much more robust than the older Armstrong that I got with the mill. I just need to tram it in, maybe tomorrow, then I would like to install the Y axis encoder to complete the DRO. I also have a Z encoder for the knee, but I'll save that for another day.
These upgrades should allow for easier and more accurate fabrication of remaining parts.
L8R...
Wednesday, December 30, 2015
Supplementary Post
The top view of the design including the new engine, alternator and batteries will be something like the figure below:
I probably will have to move the front crossmember forward slightly - easy as it is bolted in. Also, I will probably have to adjust the center cross member - harder as it is welded in - or move the alternator to the rear more if I use smaller batteries.
Currently I am searching for a (hopefully) standard part like the following:
A blade adapter for a mower that slips over the shaft which holds the blade and provides a pulley for the alternator. Normally these types drive a transmission for self propelled mowers, and the pulleys are about 2.5 inches in diameter. If the engine turns at 3150 RPM, the Alternator should turn at about 4500 RPM for peak efficiency, I'll need about a 3.75 inch diameter. I'll probably have to make or modify one. Some of these are cast pot metal, but some are steel. I could cut the pulley off and weld on the correct size worst case, but for now the search continues...
The top view of the design including the new engine, alternator and batteries will be something like the figure below:
I probably will have to move the front crossmember forward slightly - easy as it is bolted in. Also, I will probably have to adjust the center cross member - harder as it is welded in - or move the alternator to the rear more if I use smaller batteries.
Currently I am searching for a (hopefully) standard part like the following:
A blade adapter for a mower that slips over the shaft which holds the blade and provides a pulley for the alternator. Normally these types drive a transmission for self propelled mowers, and the pulleys are about 2.5 inches in diameter. If the engine turns at 3150 RPM, the Alternator should turn at about 4500 RPM for peak efficiency, I'll need about a 3.75 inch diameter. I'll probably have to make or modify one. Some of these are cast pot metal, but some are steel. I could cut the pulley off and weld on the correct size worst case, but for now the search continues...
The last few days have been more about thinking hard about the next few decisions, and buying a few more of the remaining items.
The chassis is done, and the battery tray (temporary) is in place (no pics, sorry). This led to the hard thinking of what battery do I want - exactly which ones and how will they be mounted.
I was originally going to put two old deep cycle batteries in and press an old scrappy lawnmower deck into service, but both of those choices seem to be a lot of work that would have to be completely redone at some point. Besides, that old mower is really a piece of junk anyway. With a pair of batteries, I could get one cutting done, then they need a recharge. If I get too far from the house and run out of juice, I'd have to tow it back.
The final plan is to have batteries, an alternator, and an engine with electric start/kill switch/pressure lubrication.
It occurred to me that I can use smaller ( lighter, cheaper ) batteries if I run an alternator. On average, if the batteries remain fully charged, or nearly so, I can run much longer with less worry.
If I'm going to make the drive system for an alternator, I really only want to do that once so why don't I get the final stuff now.
1) New Engine - a Briggs & Stratton 121S75-2119 new from a surplus house. Full pressure lube with oil filter, 12V electric start, 3150 RPM, 190 CC OHV 8.75 torque. This is roughly what used to be called a 6 HP on a higher end mulching self propelled machine, a beefy one.
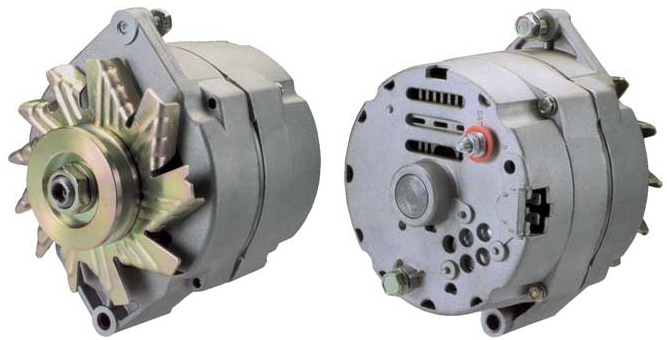
2) 24 V alternator modified single wire with a bidirectional fan as in this application it will run CCW opposite what most cars run. It was cheaper to order from Northstar Auto Electric in Macedon that buy it online. It is a modified Delco (GM) 10SI frame, one of the most popular styles ever made.
Both of the above will be in first thing next week, right after the Holiday (New Year).
With an alternator, I can avoid spending extra on deep cycle batteries and just use regular auto starting batteries. Deep cycles like to be nearly fully cycled where auto batteries do not. I can find cheaper and smaller ones, saving weight and money at the same time.
Also, with an alternator, I can reinstall the motor brakes as they draw current 100% of the time when moving, a luxury I initially thought would be bad if running straight off battery. Now, if something goes haywire on the hill, the mower won't roll away in a fault condition. That is probably a nice feature...
The chassis is done, and the battery tray (temporary) is in place (no pics, sorry). This led to the hard thinking of what battery do I want - exactly which ones and how will they be mounted.
I was originally going to put two old deep cycle batteries in and press an old scrappy lawnmower deck into service, but both of those choices seem to be a lot of work that would have to be completely redone at some point. Besides, that old mower is really a piece of junk anyway. With a pair of batteries, I could get one cutting done, then they need a recharge. If I get too far from the house and run out of juice, I'd have to tow it back.
The final plan is to have batteries, an alternator, and an engine with electric start/kill switch/pressure lubrication.
It occurred to me that I can use smaller ( lighter, cheaper ) batteries if I run an alternator. On average, if the batteries remain fully charged, or nearly so, I can run much longer with less worry.
If I'm going to make the drive system for an alternator, I really only want to do that once so why don't I get the final stuff now.
1) New Engine - a Briggs & Stratton 121S75-2119 new from a surplus house. Full pressure lube with oil filter, 12V electric start, 3150 RPM, 190 CC OHV 8.75 torque. This is roughly what used to be called a 6 HP on a higher end mulching self propelled machine, a beefy one.
2) 24 V alternator modified single wire with a bidirectional fan as in this application it will run CCW opposite what most cars run. It was cheaper to order from Northstar Auto Electric in Macedon that buy it online. It is a modified Delco (GM) 10SI frame, one of the most popular styles ever made.
Both of the above will be in first thing next week, right after the Holiday (New Year).
With an alternator, I can avoid spending extra on deep cycle batteries and just use regular auto starting batteries. Deep cycles like to be nearly fully cycled where auto batteries do not. I can find cheaper and smaller ones, saving weight and money at the same time.
Also, with an alternator, I can reinstall the motor brakes as they draw current 100% of the time when moving, a luxury I initially thought would be bad if running straight off battery. Now, if something goes haywire on the hill, the mower won't roll away in a fault condition. That is probably a nice feature...
Subscribe to:
Posts (Atom)